Monday 12 December 2022

Crafting Brilliance: The Wonders of Beadwork for Little Hands!

Today, we're delving into the mesmerizing world of beadwork, where tiny masterpieces come to life, one colorful bead at a time! As a firm believer in the magic of hands-on learning, I'm thrilled to share how beadwork can ignite creativity and enhance the development of our little ones. Beadwork, with its meditative rhythm and endless possibilities, is so much more than just a delightful craft. It cultivates fine motor skills, hand-eye coordination, and patience while also nurturing an appreciation for artistic expression. And the best part? It's a skill that both boys and girls can enjoy, creating dazzling bracelets, necklace, and decorative items!

Before we dive into the creative process, let me share a personal story. When my children first started beadwork, they were fascinated by the vibrant colors and intricate patterns. It was like watching budding artists find their voice! As we sat together, she began to experiment, creating unique designs, and the sense of accomplishment was truly heartwarming.

Now, let's get started on the step-by-step beadwork adventure!

First, gather your materials: an assortment of colorful beads, thread or string, and a needle (if age-appropriate). You can find beadwork kits specially designed for kids at craft stores or online, making it a breeze to get everything you need.

Step 1: Design Delight

Encourage your child to unleash their creativity by sketching their beadwork design on paper. This step allows them to visualize their project before diving into the enchanting world of beads.

Step 2: Stringing Magic

With their design ready, it's time to bring it to life! Show them how to thread the needle or string through the beads, and watch as their little hands weave a magic spell, creating intricate patterns and harmonious color combinations.

Step 3: Patience and Precision

As they thread each bead, teach them the art of patience and precision. Every bead matters, and their focus will grow as they see their masterpiece coming together, bead by bead.

Step 4: Finishing Flourish

Once the design is complete, it's time to tie a knot and secure the beads in place. You'll witness a spark of pride in their eyes as they hold their finished beadwork, a tangible representation of their artistic talent.

But wait, there's more! The benefits of beadwork extend beyond creativity and dexterity. Through this captivating craft, kids learn essential life skills such as perseverance, problem-solving, and following instructions. It's a craft that fosters independence and decision-making, as they choose colors and patterns that reflect their unique personalities.

As you venture into the world of beadwork with your little ones, I encourage you to explore various resources to enhance their skills further. There are countless tutorials and patterns available online, providing endless inspiration for your young artists.

Happy beading, dear parents and caregivers - may this artful journey be filled with colors and smiles that brighten your hearts! 🌈😊

On to the word of board games ... 
Learning and Fun with Board Games for Kids

Friday 25 November 2022

Whisking Up Sweet Success: How Baking Skills Make Little Chefs and Big Learners!

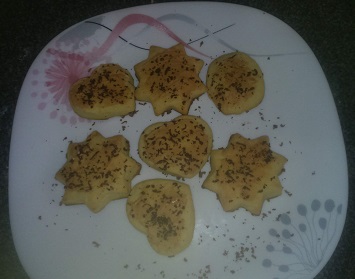
Cookies by Njoki Renee πŸ˜„
Today, we're venturing into the enchanting world of baking, where flour meets laughter, and cookies bring joy to our souls! As a parent who believes in the power of hands-on learning, let me tell you how baking has become our secret ingredient for nurturing little minds and unleashing creativity in the kitchen.


When I first introduced my kids to baking, I was met with wide-eyed excitement and enthusiastic cheers. It was like witnessing a cooking show with adorable mini-chefs in action! As we mixed, measured, and baked our way through recipes, I soon realized that this delightful activity was far more than just a fun pastime.

One of the most significant benefits of baking skills for kids is how it sparks their curiosity and fuels a love for learning. As we delved into the world of ingredients and recipes, my children began asking questions like, "What happens when we add baking powder?" or "Why do cookies rise in the oven?" These simple queries transformed our kitchen into a classroom, and I became their eager teacher, sharing the magic of science and math behind baking.


Beyond academic knowledge, baking also instills essential life skills in children. The patience required to wait for the cake to rise or cookies to cool teaches them the value of delayed gratification. Plus, the satisfaction of seeing their creations come to life fills them with a sense of accomplishment that no test score can match.

I'll never forget the time my little one mixed up the salt with sugar (oops!), resulting in hilariously salty cookies. We all had a good laugh, and it became a valuable lesson in attention to detail and the importance of trying again. Mistakes like these have the power to turn ordinary moments into extraordinary opportunities for growth and resilience.

But perhaps the most beautiful part of baking with kids is how it strengthens our bond as a family. The kitchen becomes a magical place where we share stories, laughter, and heartfelt conversations. 
From cracking eggs with giggles to decorating cakes with colorful confetti, these precious moments become cherished memories that we'll hold dear forever.


Baking also encourages creativity in a way that no textbook can. When my kids get their little hands messy with dough, they transform into artistic geniuses, shaping their treats into fantastic creatures or unique designs. The kitchen becomes their canvas, and their imagination knows no bounds.

As we bake together, I witness their confidence soar. Whether they're presenting their cupcakes at a family gathering or sharing cookies with friends, that sense of pride in their creations is undeniable. These experiences lay the foundation for their self-esteem, teaching them that they are capable of achieving great things with determination and a dash of passion.

So, dear parents and caregivers, let's put on our aprons and dive into the world of baking with our little ones. Together, we can whisk up sweet success, filling their hearts with cherished memories and their minds with valuable skills. With baking as our recipe for joy and learning, our kids will not only become tiny chefs but big learners, ready to take on the world, one delightful bite at a time!

Now, who's ready to sprinkle a little magic into our lives? πŸͺ🍰


Thursday 1 September 2022

From Trash to Treasure

In our pursuit of sustainable and creative learning experiences, we stumbled upon a wonderful activity that transformed ordinary household items into extraordinary treasures. Creating pencil holders from reused toilet paper rolls became a delightful hands-on project for my children. In this article, we embark on a journey of imagination and resourcefulness, exploring the benefits of recycling and how this simple DIY craft positively impacted my children's learning and development.

The joy of repurposing toilet paper rolls into beautiful pencil holders is a lesson in resourcefulness and environmental responsibility. My children discovered the magic of transforming something discarded into a useful and aesthetic creation. Through this simple act of recycling, they developed a sense of responsibility towards the environment and the importance of repurposing materials.


Resources

  • Toilet roll tubes
  • Ruler 
  • Pencil
  • Glittering wrapping paper
  • Scissors 
  • Glue 
  • Hot glue gun.
  • Cardboard

Procedure

Step 1: Customizing the Tube Lengths

To begin this creative journey, carefully cut the toilet paper roll tubes into several different lengths according to your preferences. Embrace the freedom to choose the sizes that best suit your creative vision. Whether tall, short, or in-between, let your imagination guide you.

Step 2: Adding a Touch of Sparkle Now comes the fun part!

Lay the toilet paper rolls on the glittering wrapping paper and cut pieces to cover their exteriors. With careful precision, wrap and stick the paper in place with glue. Watch as the sparkle transforms these humble rolls into dazzling pencil holders.

Step 3: Assembling with Care

With the glittering exteriors ready, it's time to assemble the pencil holder. Using a hot glue gun, carefully glue the tubes together one by one in a group. Take your time to ensure they are securely attached, creating a sturdy foundation for your masterpiece.

Step 4: Crafting the Base

To provide the pencil holder with a stable base, cut a piece of cardboard to your preferred size. This will serve as the foundation for the pencil holder. Glue the group of tubes to the middle of the cardboard, aligning them perfectly for a polished finish.

Step 5: Ready to Spark Creativity Congratulations!

Your DIY pencil holder is now ready to shine. Fill it with an array of stationery, from colorful pens to trusty pencils. Watch as this handcrafted creation becomes a true work of art, adding a touch of personality and charm to your study or workspace.


The kids decorated and personalized their pencil holders with vibrant glittering colors papers and imaginative designs. This hands-on experience not only nurtured their creativity but also honed their fine motor skills as they carefully handled the brushes and decorations. The moment they completed their pencil holders, my children beamed with pride and a sense of accomplishment. The joy of seeing their finished creations filled them with a profound sense of satisfaction. This simple DIY project taught them that even small efforts can yield remarkable results, boosting their self-esteem and motivation to take on new challenges.


Creating pencil holders from toilet paper rolls encouraged independence and problem-solving. My children were empowered to make decisions about colors, patterns, and decorations, leading to a sense of ownership and pride in their creations. They eagerly brainstormed ideas and found solutions to design challenges, fostering their problem-solving skills.


Whisking Up Sweet Success: How Baking Skills Make Little Chefs and Big Learners!

Friday 8 April 2022

Magic of Flash Cards in Early Childhood Education

Early childhood education is a journey filled with curiosity and wonder. One of the most remarkable tools that have enriched this journey for my children is using flash cards. Flashcards serve as a gateway to a world of exploration and understanding for young minds. When my children saw these colourful cards, their imaginations took flight. Each card became a window to new knowledge, sparking their curiosity and eagerness to learn. Whether it was alphabets, numbers, shapes, or animals, flashcards transformed learning into a delightful adventure.

Making of the cards


Resources

  • Printed pictures 
  • Cardboard
  • Glue
  • Scissors

You can make your own flashcards that will be more engaging and fun for the kids and will test their creativity. The card would be more relatable. 

Steps

  1. Download pictures from the preferred source
  2. Print and cut out the pictures
  3. Cut the cardboard as per the printed images (ours were "5 x 7" inches)
  4. Use a glue stick to stick the pictures on the cardboard.

Incorporating flashcards into our educational routine turned learning into playtime. We transformed simple activities like matching, sorting, and identifying into exciting games. As my children engaged with the flashcards, their eyes lit up with joy, and laughter filled the room. 
It was a precious sight to witness as they immersed themselves in playful learning, wholly absorbed in the magic of these hands-on tools. Flash cards became a trusted ally in strengthening memory and retention. My children quickly grasped new concepts through regular exposure to the cards and effortlessly retained the information. Repetition through flashcards proved an effective strategy, allowing them to internalize the material and build a solid foundation for future learning. 

Their self-assurance soared as my children confidently identified letters, recognized numbers, and named shapes. Flashcards provided a sense of accomplishment, boosting their confidence and encouraging them to take charge of their learning. 


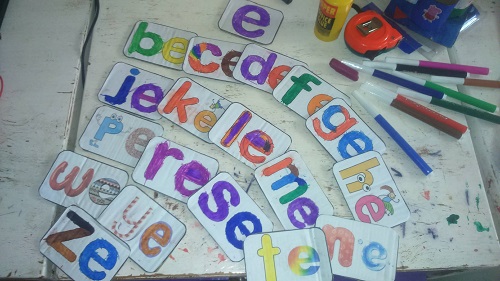
Let the power of flashcards be the guiding light that empowers our little learners to change the world through the magic of hands-on learning. Together, we shape a future where education is a joyous adventure and young minds flourish with curiosity and understanding. Click to watch Vowel e Sound


Let's embark on the next captivating article ... From Trash to Treasure 

Saturday 12 March 2022

Alphabet Word Wheels: Igniting Early Learning!

In the captivating world of early childhood education, nurturing young minds with engaging and interactive learning experiences is the key to unlocking their full potential. Among the treasure trove of educational resource tools, the alphabet word wheel stands as a shining beacon that empowers children to embark on a magical journey of language exploration. In this article, we delve into the manifold benefits of incorporating alphabet word wheels into early childhood education, sharing personal anecdotes illuminating its positive impact on children's learning and development. From building essential language skills to fostering creativity and critical thinking, we unveil the transformative power of this hands-on tool that leaves an indelible mark on the path to lifelong learning.

A Gateway to Language Exploration 

As a parent and an enthusiastic advocate of early childhood education, I have witnessed the profound impact of the alphabet word wheel in nurturing language skills. Watching my children interact with this interactive tool has been a joyous sight. From the very first spin, their eyes light up with excitement as they discover the wonders of language. They explore the letters, form words, and experiment with sounds, setting foot on a thrilling journey of language exploration.


Language Fluency and Vocabulary Expansion 

One invaluable skill that blossomed through the alphabet word wheel is language fluency. As my children spun the wheel to create new words, I observed their vocabulary expanding by leaps and bounds. The interactive nature of the word wheel sparked their curiosity, and they delighted in discovering new words to express their thoughts and emotions. Their ability to communicate effectively blossomed, allowing them to confidently share their ideas and engage in meaningful conversations.


A Hands-On Approach to Literacy 

A hands-on approach is essential to cultivate a love for reading and writing. The alphabet word wheel became a magical tool in our literacy adventures. My children eagerly manipulated the letters, crafting their own words and sentences and making other word wheels. Their confidence in reading and constructing sentences grew with each twist and turn of the wheel. The joy of hands-on learning transformed language from an academic pursuit to a personal voyage of discovery.


Fostering Creativity and Critical Thinking 

The benefits of the alphabet word wheel extend far beyond language skills. As my children explored the different letter combinations, they tapped into their innate creativity. The word wheel provided a canvas for imaginative wordplay, where they crafted stories and invented characters with ease. This creative journey ignited their minds, encouraging them to think outside the box and embrace their unique ideas.


Alphabet Word Wheel for Letter C (Soft)


Tuesday 1 February 2022

A 3D Part of a Plant ActivityA 3D Plant Part Craft: Engaging Nature's Wonders with Imagination

In the world of learning, nothing compares to the magic of hands-on activities. A delightful and enlightening journey awaits as we delve into a simple yet engaging 3D plant part craft activity that will spark curiosity and nurture young minds. Before embarking on this adventure, take a moment to sow the seeds of wonder by planting a seed and witnessing its transformation into a magnificent flower. Observing this remarkable journey will pave the way for identifying the various parts of a plant and their roles in the grand symphony of growth.

Gather these readily available materials:
a) Seeds (pawpaw seeds were used in our exploration)
b) Brown, green, and blue Manilla papers or paint of similar hues.
c) Brown construction/flour paper (alternatively, employ brown thread)
d) Paintbrushes
e) 4 cupcake liners
f) Glue or tape
g) Scissors
h) Marker pen

Let's embark on the creation:
Begin by painting the lower quarter of a plain white paper brown, and the rest blue. Allow the paint to dry. For a time-saving approach, colored papers can represent the sky, grass, and leaves, while construction/flour paper can depict soil and roots. Now, glue a green craft/painted paper strip onto the blue paper to form the stem. 
Next, fold the cupcake liners and artfully arrange them in a circular pattern at the top of the stem. Nestle the pawpaw seeds gracefully at the center of the cupcake liners. Cut two leaf-shaped papers and strategically glue them onto the stem at different points.

For the roots, cut the brown construction/flour paper into thin strips, gently crumpling them to mimic the appearance of real roots. Alternatively, brown threads can also fulfill this role. Just above the brown section, place a strip of green-colored paper to represent the grass. Make a continuous cut halfway into the strip to give the illusion of lush grass.
Finally, fashion five rectangular papers and label them "flower," "seeds," "leaves," "stem," and "roots." Clearly affix each piece to the craft, marking the parts of a plant, as exemplified in the image above.

Through this imaginative journey, your child will: 
• Identify the various parts of a plant. 
• Craft different plant parts inspired by their natural surroundings. 
• Develop a keen interest in plant anatomy for both learning and delight.

This delightful activity also fosters competencies such as communication and collaboration, as children work together in groups. Their imagination and creativity will shine as they personalize their crafts, while assimilating new knowledge and applying it to diverse yet interconnected contexts.

As you embark on this creative endeavor, embrace the joys and challenges it brings. Share your experiences, the benefits you observe, and any clarifications you may need in the chat comments. Together, let's nurture the blossoming minds of the next generation, as they connect with the wonders of nature and the marvels of learning.

Monday 24 January 2022

Creating Your Own Respiratory System Model

See previous article on how to make homemade modelling clay https://hands-on-kids-activities.blogspot.com/2022/01/home-made-modelling-clay.html

Have you ever wondered how our cells get the oxygen they need? It's all thanks to the remarkable respiratory system, which plays a vital role in delivering oxygen to our blood. Now, imagine being able to see how this incredible system works right in front of your eyes! With a fun and educational activity, children can make their very own respiratory system model using homemade modeling clay.

By engaging in this hands-on project, children not only learn about the essential organs involved in breathing but also gain a deeper understanding of their functions and how they all come together to keep us alive and healthy.


Let's take inspiration from the experience of my 14-year-old niece, who was struggling to grasp the complexities of the respiratory system in her Form 1 class. To help her overcome this challenge, she decided to create her own respiratory system model. Little did she know that this creative endeavor would prove to be an eye-opening and enlightening experience. 

As she carefully molded the different organs of the respiratory system using colorful homemade modeling clay, she started to visualize how each organ fits and interacts with the others. The magic happened when she observed her handcrafted model in action. She could see how air moves in and out of the lungs, and suddenly, everything clicked into place.

With her homemade respiratory system model, my niece discovered an exciting way to learn. Each labeled organ became a gateway to understanding its unique function. The model transformed her understanding of breathing from an abstract concept to a concrete and tangible reality. 

To create your own respiratory system model, you'll need some easily accessible materials. Grab some assorted colors of homemade modeling clay and prepare a carton box, printing paper, markers, glue, scissors, and optional blank labels.

Begin by tracing the outline of a human head to the shoulder level on the printing paper or Manila paper. Next, let your creativity flow as you knead and shape the clay into the different organs of the respiratory system. Don't forget to label each structure accordingly for a complete learning experience.

Through this hands-on activity, children can explore the wonders of the respiratory system in a fun and interactive way. As they manipulate the clay and bring the model to life, they'll gain invaluable insights into how our bodies breathe and absorb oxygen to support life. 

So, if you're curious about the remarkable workings of your own respiratory system, why not embark on this educational journey? Making your very own respiratory system model is not only a fantastic learning experience but also a testament to the power of creativity in education. Let your imagination soar as you dive into the world of the human body and discover the marvels of the respiratory system.


Respiratory System

Monday 17 January 2022

Crafting a Homemade Digestive System Model with Modeling Clay

See previous article on how to make homemade modeling clay https://hands-on-kids-activities.blogspot.com/2022/01/home-made-modelling-clay.html

Want to ignite a child's curiosity and make learning captivating? Look no further than modeling or simulating real-life objects. When my Grade 3 child struggled to grasp the complexities of the digestive system, we embarked on a fascinating journey of creating her own digestive system model using homemade clay. With enthusiasm and determination, she spent her afternoon meticulously crafting this educational masterpiece.

To bring her vision to life, we gathered the following materials:

• Assorted colors of homemade modeling clay

• A carton box

• Printing paper or Manila paper

• Mark pen or pencil

• Glue

• Scissors

• Printed blank labels (optional)


First, we traced the outline of a human body structure on the printing paper or Manila paper, capturing the region from the head to the hip area. With skillful hands, she kneaded and molded the clay into different shapes, precisely replicating the organs of the digestive system. Each structure was carefully labeled to ensure accuracy.

First, we traced the outline of a human body structure on the printing paper or Manila paper, capturing the region from the head to the hip area. With skillful hands, she kneaded and molded the clay into different shapes, precisely replicating the organs of the digestive system. Each structure was carefully labeled to ensure accuracy.
The objective of this hands-on activity was twofold: to create an accurate digestive system model using easily available materials and to simplify the complex process of digestion. Through this engaging process, she not only identified each organ and its location but also explained its function and the overall process of digestion. Click on https://www.instagram.com/p/CvXMO64Ajlt/ to hear her eloquently describing the journey of food through the digestive system.

Listening to her explanation, you might notice a few initial misconceptions. However, with dedication and learning from her mistakes, she confidently presented and shared her knowledge with her classmates. The process of creating the digestive system model not only fostered a deeper understanding but also instilled a sense of accomplishment and pride in her newfound expertise.

Crafting this homemade model of the digestive system proved to be an exceptional educational tool, combining creativity, hands-on learning, and effective communication skills. It provided an immersive experience that transcended traditional classroom teaching, igniting a spark of curiosity and making the learning process truly enjoyable.

As a parent, witnessing my child's enthusiasm and growth through this interactive project reaffirmed the value of creative learning experiences. The process of modeling the digestive system using simple materials not only deepened her knowledge but also sparked her interest in exploring other scientific concepts in a similarly engaging manner.

This endeavor highlights the power of interactive learning and demonstrates how homemade educational resources can effectively supplement traditional teaching methods. By creating a tangible and visually engaging model, we empowered our child to grasp complex concepts with ease and enthusiasm.

So, if you're looking to make learning enthralling and impactful, why not embark on a creative journey with your child? The possibilities are endless, and the rewards are immeasurable. With a little imagination, some homemade clay, and a dash of curiosity, you can unlock a world of learning opportunities for your young explorer.


Wednesday 5 January 2022

Creative Fun at Home: DIY Modeling Clay - Engaging Kids in Colorful Creations

When indulging in arts and crafts at home, we faced the challenge of limited modelling clay availability. To overcome this, we devised a fantastic idea of making our own at home—a fun process where the kids can mix colors and create a rainbow set of dough, molding it into various shapes, letters, and numbers.

Using modeling clay has proven to be an excellent way to keep the kids entertained and engaged on technology-free weekends. The act of making, hitting, pounding, kneading, and rolling the clay brings a sense of relaxation, even for me as I squeeze and stretch it with my hands.


Beyond the fun, playing with modeling clay has numerous benefits, particularly in terms of play-based learning and skill development. It nurtures creativity, imagination, and collaboration, while also enhancing hand and finger muscles as the kids manipulate the clay to achieve desired shapes.

Note: the quantity of the ingredient(s) is not fixed and may vary depending on the type of product or the texture of the clay one wants to achieve.

Here's the simple recipe we used to make the clay:

Ingredient

  •  2 cups of flour
  •  1 cup Salt
  • 2 Table spoons of vegetable oil
  •  1 1/2 Cup of water
  • Assorted Food Color
  • Bowls
  • Pan/Sufuria
Steps
1.      Heat water, oil, and salt in a pan until warm.
2.     Divide the warm mixture into different bowls, depending on the colors you want to achieve.
3.     Add 3 to 4 drops or a pinch of food color to each bowl as desired.
4.     Gradually add flour to each bowl, kneading until the dough becomes smooth and non-sticky.
5.     Store the modeling clay in a Ziploc bag in the refrigerator for about 15 minutes or cover the bowl with cling film foil.
We experimented with primary colors—red, yellow, and blue—to create a wide range of colors. I took the kids through the color mixing wheel, broadening their imagination as they got messy mixing colors and forming various modeling clay creations.
(See the link for reference https://www.bforball.com/mixing-colors.php)
The homemade clay is safe for all ages and poses no harm if accidentally consumed.

Playing with this DIY modeling clay has been an enriching experience for the kids, sparking their creativity and fostering an appreciation for the wonders of colors and shapes. It's an educational and entertaining activity that we highly recommend for all families. For a glimpse of the fun, check out the links below to see the kids enjoying themselves, molding letters, shapes, and using shape cutters.


The captivating realm of Rubik's Cube solving 🎲

If you are curious, you'll find the puzzles around you. If you are determined, you will solve them ErnΕ‘ Rubik Once upon a time, a Hunga...